Boilerplate for your Node projects with Express
In this article I want to share with you how to structure my Node projects step by step using Express, Typescript, Jest, ESLint and Prettier.

For our REST application we’re going to use Express because it is a flexible, fast, unopinionated and minimalist web framework for Node.js. Let’s start:
Set up project
Create an empty folder with the name of your project. You can use this command (replace the content in <your-app-name>)
mkdir node-<your-app-name>-serverI use Visual Studio Code for development, open this folder using Visual Studio Code or your editor of choice.
Let’s initialize the project, open a terminal and write this command
npm initThis command will ask you some questions about the project, for example: the name, version, description, the project repository, keywords, author and license type. You can complete these recommendations or complete it later.

This command will create a package.json file. The file is essential in Node.js applications, as it contains crucial information about the project, such as its dependencies, execution scripts, version, and configurations. It facilitates dependency management, deployment and execution of custom commands.
Let’s add some development dependencies includes Typescript, in my case I’m using yarn dependency manager, but you can use others like npmor pnpm.
yarn add -D typescript ts-node-dev @types/node rimrafWe need to set up the Typescript configuration for our project in tsconfig.json file. Use this command to create this file:
yarn tsc -initUpdate tsconfig.json file with these configurations:
{
  "exclude": ["node_modules", "dist", "src/**/*.test.ts"],
  "include": ["src/**/*"],
  "compilerOptions": {
    "types": ["node", "jest", "express"],
    "target": "ESNext",
    "module": "CommonJS",
    "rootDir": "./src",
    "moduleResolution": "Node",
    "typeRoots": ["./node_modules/@types"],
    "sourceMap": true,
    "outDir": "dist/",
    "esModuleInterop": true,
    "forceConsistentCasingInFileNames": true,
    "strict": true,
    "strictNullChecks": true,
    "skipLibCheck": true
  }
}
We can use a specific version of node for our server, create a new .nvmrc file in the root of your project, or you can use this command to generate it.
node -v > .nvmrcIn the root of your project, create a new folder called src/. Inside this folder, create a new file (app.ts) to run our application.
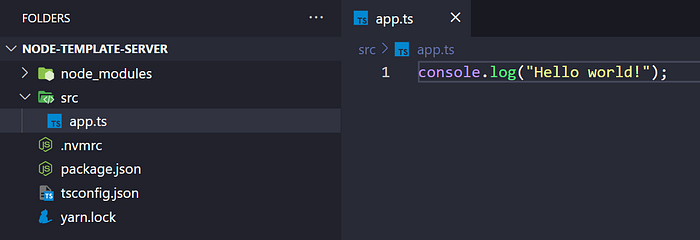
To run the application, we need to set some commands in package.json.
{
  ...
 "scripts": {
  "dev": "ts-node-dev --respawn --clear --transpile-only --ignore-watch node_modules ./src/app.ts",
  "build": "rimraf ./dist && tsc",
  "start": "node dist/app.js",
 },
  ...
}ts-node-dev: This is a tool that allows you to run TypeScript files directly in Node.js without the need to compile the code beforehand. It provides additional functionalities for a convenient development environment.
--respawn: This flag instructs ts-node-dev to restart the application when changes in source files (like .ts files) are detected. It's useful for keeping the application running during development and automatically applying changes made.
--clear: This flag clears the terminal screen before each restart of the application. It provides a cleaner development experience by removing previous terminal output.
--transpile-only: This flag tells ts-node-dev to only transpile TypeScript code to JavaScript without performing any type checking. This speeds up the transpilation process by skipping type checking during development, which can be useful in large projects where type checking can be a costly operation.
--ignore-watch node_modules: This flag tells ts-node-dev to ignore changes made in the node_modules folder. Since changes in this folder typically don't require restarting the application during development, this helps to avoid unnecessary restarts and improves performance.
With these flags we create a convenient and efficient development environment, enabling real-time execution and an optimized development experience. And the commands:
"build": "rimraf ./dist && tsc": This command cleans the output directory and then compiles the TypeScript code into JavaScript.
"start": "yarn build && node dist/app.js" Executes the compilation and then starts the application by running the resulting JavaScript file.
In my case, I prefer to use yarn as a package manager, to set this config create a new .npmrc file in the root of your project:
engine-strict=trueAnd add engines property in package.json (use your owns node and yarn versions).
{
 ...
 "engines": {
  "node": ">=20.12.0",
  "yarn": ">=1.22.19",
  "npm": "please-use-yarn"
 },
 "scripts": {
  "dev": "ts-node-dev --respawn --clear --transpile-only --ignore-watch node_modules ./src/app.ts",
  "build": "rimraf ./dist && tsc",
  "start": "node dist/app.js",
 },
  ...
}
You can run the application:
yarn devTesting environment
For our testing environment, we are going to use Jest. Jest is a popular testing framework developed by Facebook for JavaScript projects. It’s known for its simplicity, speed, built-in features like snapshot testing, and minimal configuration requirements. These qualities make Jest convenient for writing and executing unit, integration, and end-to-end tests efficiently in JavaScript and TypeScript projects.
Add Jest dependency
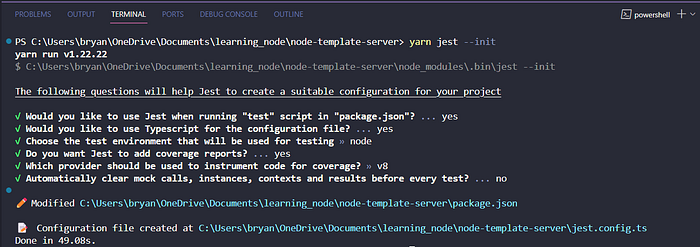
yarn add -D jest @types/jest ts-jest supertest @types/supertestCreate Jest config file jest.config.ts using this command:
yarn jest --initThis command will ask you some questions, here are my answers:
Update jest.config.ts file with these configurations:
import type {Config} from 'jest';

const config: Config = {
  clearMocks: true,
  collectCoverage: true,
  coverageDirectory: "coverage",
  coverageProvider: "v8",
  preset: 'ts-jest',
  testEnvironment: "jest-environment-node",
};

export default config;
Add tests scripts in your package.json file
{
  ...
 "scripts": {
  "test": "jest",
  "test:watch": "jest --watchAll",
  "test:coverage": "jest --coverage",
  "dev": "ts-node-dev --respawn --clear --transpile-only --ignore-watch node_modules ./src/app.ts",
  "build": "yarn test && rimraf ./dist && tsc",
  "start": "node dist/app.js"
 },
  ...
}
These commands use Jest to run tests in a project:
"test": "jest": Executes all tests in the project.
"test:watch": "jest --watchAll": Runs tests in watch mode, re-running them automatically when changes are detected.
"test:coverage": "jest --coverage": Runs tests and generates a code coverage report to identify untested areas of the code.
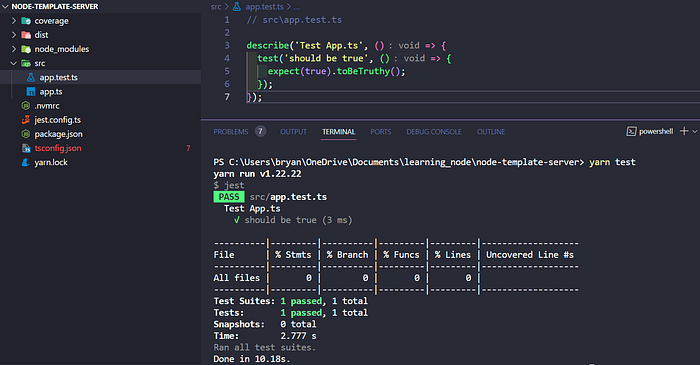
Now let’s create a simple test file in our application
// src\app.test.ts

describe('Test App.ts', () => {
 test('should be true', () => {
  expect(true).toBeTruthy();
 });
});
And, we can run our test files using yarn test
Don’t forget, create a README.md file to write important information about your application.
If you want to use git, you can initialize git in your project using git init after that create a .gitignore file in the root of your project. This file is used in Git projects to specify which files and directories should be ignored by Git, meaning they should not be tracked or included in version control.
node_modules/
dist/
coverage/
.env
ESLint & Prettier
ESLint helps maintain code standards by allowing custom rule definitions for code style and detecting common errors, while Prettier automatically formats the code to comply with these rules, ensuring consistency throughout the project and easing code maintenance. This combination enhances code quality by detecting syntax errors, potential bugs, and bad practices, thereby reducing the likelihood of introducing errors. Additionally, Prettier eliminates debates over code style within the team, allowing developers to focus on business logic rather than code aesthetics, thus boosting productivity.
Let’s add ESLint dependency in our project
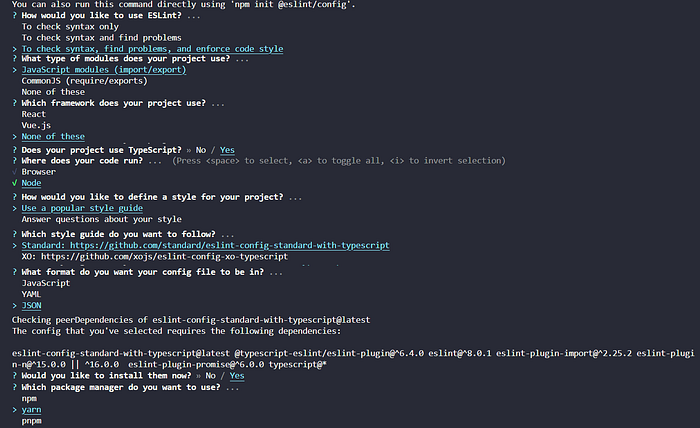
yarn add -D eslintInitialize ESLint config with this command
yarn eslint --initThis command will ask you some questions, here are my answers:
Update .eslintrc.json file with these configurations:
{
 "env": {
  "es2021": true,
  "node": true
 },
 "extends": [
  "standard-with-typescript",
  "plugin:prettier/recommended",
  "eslint:recommended",
  "plugin:@typescript-eslint/recommended"
 ],
 "plugins": ["@typescript-eslint", "import", "prettier"],
 "parserOptions": {
  "ecmaVersion": "latest",
  "sourceType": "module",
  "project": "./tsconfig.json"
 },
 "ignorePatterns": ["src/**/*.test.ts"],
 "rules": {
  "prettier/prettier": "error",
  "camelcase": "error",
  "spaced-comment": "error",
  "quotes": ["error", "single"],
  "no-duplicate-imports": "error",
  "no-unused-vars": "off",
  "no-magic-numbers": "off",
  "@typescript-eslint/no-unused-vars": "error",
  "@typescript-eslint/explicit-function-return-type": "error",
  "@typescript-eslint/strict-boolean-expressions": "off",
  "@typescript-eslint/no-extraneous-class": "off",
  "@typescript-eslint/no-magic-numbers": "error"
 }
}
Let’s add some Prettier dependencies in our project
yarn add -D prettier eslint-plugin-prettier eslint-config-prettierCreate .prettierrc file with this content (this is my Prettier configuration)
{
  "arrowParens": "always",
  "bracketSpacing": true,
  "insertPragma": false,
  "printWidth": 120,
  "proseWrap": "preserve",
  "quoteProps": "as-needed",
  "requirePragma": false,
  "semi": true,
  "singleQuote": true,
  "tabWidth": 2,
  "trailingComma": "none",
  "useTabs": true,
  "endOfLine": "auto",
  "overrides": [
    {
      "files": ".prettierrc",
      "options": { "parser": "typescript" }
    }
  ]
}
Remember to install ESLint and Prettier extensions in Visual Studio Code
Create .eslintignore file with this content
node_modules/
dist/
jest.config.ts
Create .prettierignore file with this content
.yarn
dist
node_modules
.prettierrc
Environment variables
Environment variables are specific values configured outside the source code and passed to the project’s runtime environment. These variables are useful for storing sensitive information or configurations that may vary depending on the development environment, such as database credentials, API keys, external service URLs, etc. Using environment variables instead of hard-coded values in the source code provides flexibility and security to the project, allowing configuration changes without modifying the code.
To use environment variables in our project, we need to install these dependencies:
yarn add dotenv env-varLet’s create two files .env and .env.template in the root of the project, in the .env file we can define these variables
PORT=3000
DEFAULT_API_PREFIX=/api/v1
NODE_ENV=development
The .env allows other developers to create or set their different variables values. Don’t forget to create a template of what these variables look like in the .env.template file.
PORT=
DEFAULT_API_PREFIX=
NODE_ENV=
To use these environment variables in our project, create a file to create this configuration, I usually create this file in the src/core/config/ directory.
In this directory, you must create adapters to third-party dependencies. This practice can be useful to change dependencies easily during development.
// src/core/config/env.ts

import 'dotenv/config';
import { get } from 'env-var';

export const envs = {
 PORT: get('PORT').required().asPortNumber(),
 API_PREFIX: get('DEFAULT_API_PREFIX').default('/api/v1').asString(),
 NODE_ENV: get('NODE_ENV').default('development').asString()
};
Finally, let’s install and configure express. We need some dependencies
yarn add express express-rate-limit compressionAnd some development dependencies
yarn add -D @types/compression @types/expressI recommend you to create a file with constants for your project. In this file, we can use “magic numbers”.
// src/core/constants/index.ts

/* eslint-disable @typescript-eslint/no-magic-numbers */

export const SIXTY = 60 as const;
export const ONE_HUNDRED = 100 as const;
export const ONE_THOUSAND = 1000 as const;

export enum HttpCode {
 OK = 200,
 CREATED = 201,
 NO_CONTENT = 204,
 BAD_REQUEST = 400,
 UNAUTHORIZED = 401,
 FORBIDDEN = 403,
 NOT_FOUND = 404,
 INTERNAL_SERVER_ERROR = 500
}
Create src/server.ts file with all Express configuration
// src/server.ts

import express, { type Request, type Response } from 'express';
import compression from 'compression';
import rateLimit from 'express-rate-limit';

import { HttpCode, ONE_HUNDRED, ONE_THOUSAND, SIXTY } from './core/constants';

interface ServerOptions {
 port: number;
 apiPrefix: string;
}

export class Server {
 private readonly app = express();
 private readonly port: number;

 constructor(options: ServerOptions) {
  const { port } = options;
  this.port = port;
 }

 async start(): Promise<void> {
  //* Middlewares
  this.app.use(express.json()); // parse json in request body (allow raw)
  this.app.use(express.urlencoded({ extended: true })); // allow x-www-form-urlencoded
  this.app.use(compression());
  //  limit repeated requests to public APIs
  this.app.use(
   rateLimit({
    max: ONE_HUNDRED,
    windowMs: SIXTY * SIXTY * ONE_THOUSAND,
    message: 'Too many requests from this IP, please try again in one hour'
   })
  );

  // Test rest api
  this.app.get('/', (_req: Request, res: Response) => {
   return res.status(HttpCode.OK).send({
    message: `Welcome to Initial API! \n Endpoints available at http://localhost:${this.port}/`
   });
  });

  this.app.listen(this.port, () => {
   console.log(`Server running on port ${this.port}...`);
  });
 }
}
And let’s update src/app.ts file
// src/app.ts

import { envs } from './core/config/env';
import { Server } from './server';

(() => {
 main();
})();

function main(): void {
 const server = new Server({
  port: envs.PORT
 });
 void server.start();
}
Now, we can run our application
yarn dev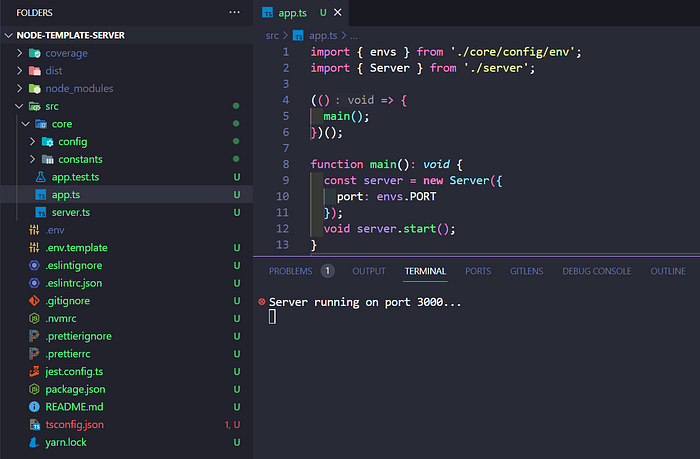
We can test our local server in http://localhost:3000/

It may be a lot of work to implement all this BEFORE starting with your development, however I consider it is essential in your projects, good practices, a standard of work and a predisposition to do things in the best way will help you grow as a developer and work in a more orderly and proactive way. Now I invite you to follow these tips and recommendations for your current and future developments.
In another article I’ll show you how to create an endpoint using Clean Architecture and the use of patterns such as the Repository Pattern, the DTO Pattern, and we will create a connection to a database using best practices.
If you think this repository has been useful to you, do not hesitate to leave your star or your clap in this article. Source code of this project (see set-up-project branch):
You can find this and others in my GitHub repository. Don’t forget to visit my website.
Thank you for reading this article!
If you have any questions, don’t hesitate to ask me. My inbox will always be open. Whether you have a question or just want to say hello, I will do my best to answer it!